
When working with digital workflows, many professionals often ask how to add new scan file to Easy Stand Alone. This process might look tricky in the beginning, but with the right method, it becomes simple and efficient. In this detailed guide, you will learn every step in human-friendly language. Whether you are a beginner or experienced, this article will help you set up scan files properly without confusion.
Understanding Easy Stand Alone
Before we move into how to add new scan file to Easy Stand Alone, let’s first understand what Easy Stand Alone actually is. It is a software that allows you to manage, store, and process scan files independently without needing a connected server or additional tools. Many users in the dental, design, and engineering industries rely on it for quick data management.
The main benefit of Easy Stand Alone is that it is lightweight, simple to use, and doesn’t require high technical skills. Once you know how to add new scan file to Easy Stand Alone, you can save time and improve workflow.
Step-by-Step Guide: How to Add New Scan File to Easy Stand Alone
Step 1: Prepare Your Scan File
First, make sure your scan file is complete and saved in the correct format supported by Easy Stand Alone. Common formats include STL, OBJ, or PLY. Always double-check your file before uploading.
Step 2: Open Easy Stand Alone
Launch the Easy Stand Alone software on your system. If it is your first time, ensure the software is installed correctly and updated to the latest version.
Step 3: Locate the Import Option
In the main dashboard, look for the File or Import option. Different versions of Easy Stand Alone may have slightly different layouts, but the import option is usually easy to find.
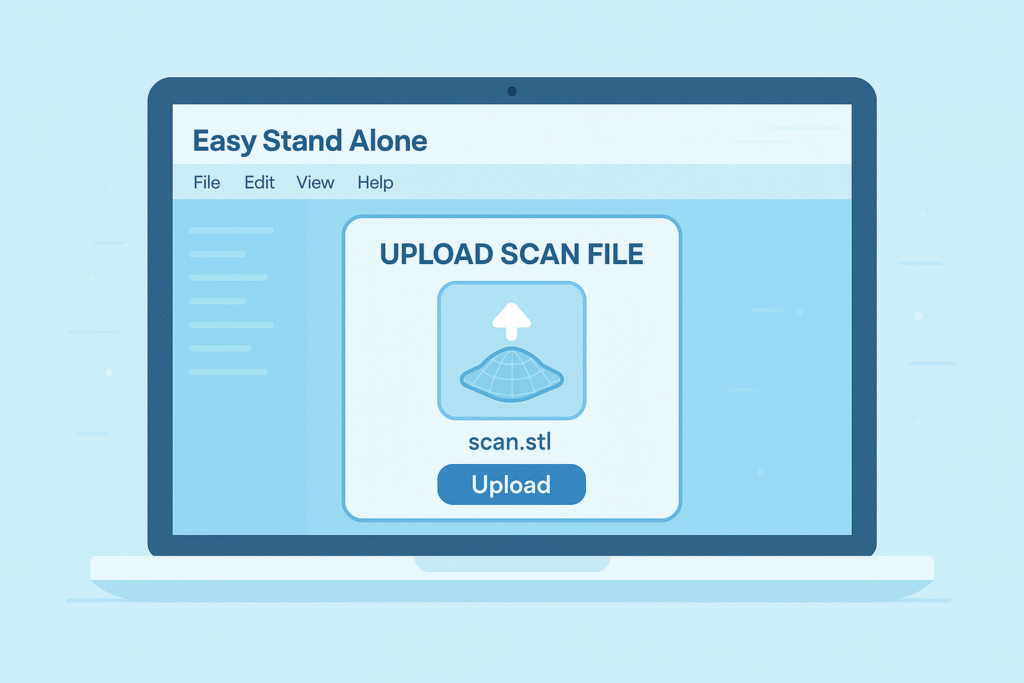
Step 4: Upload the Scan File
Click on Import Scan File and select the file from your device storage. Once selected, press Open or OK to upload. The system will process the file and display it within the software.
Step 5: Verify File Placement
After importing, verify if the file is placed correctly. Rotate or zoom to check details and make sure nothing is missing.
Step 6: Save Your Project
Finally, save your project with a proper name for easy future access. With this step, you have successfully added a new scan file to Easy Stand Alone.
Common Issues and Fixes
Sometimes users face problems while learning how to add new scan file to Easy Stand Alone. Below are a few common problems along with their solutions.
- File Not Supported: Convert your file into STL or OBJ format before uploading.
- Software Crashes: Update your Easy Stand Alone software to the latest version.
- Slow Processing: Check your device specifications and free up memory.
- Incorrect File Placement: Re-import the file and use alignment tools.
Why Use Easy Stand Alone for Scan Files?
Understanding how to add new scan file to Easy Stand Alone is only part of the story. The real question is why this tool is popular. Here are some reasons:
- User-friendly interface
- Independence from other systems
- Fast processing
- Compatible with most common scan formats
- Useful for professionals in dentistry, design, and product development
Exploring More About Easy Stand Alone
While learning how to add new scan file to Easy Stand Alone, it also helps to understand other ways this tool can be used. For example, many professionals look for Easy Stand Alone scan import options when handling multiple files at once. Others often search how to upload scan file in Easy Stand Alone to simplify their workflow. If you are working with 3D data, knowing how to add STL file Easy Stand Alone can save you valuable time. Beginners can also follow an Easy Stand Alone tutorial to get step-by-step guidance. For those who want broader solutions, exploring a reliable scan file management software can further enhance productivity and efficiency.
Practical Tips for Beginners
If you are just starting and want to master how to add new scan file to Easy Stand Alone, keep these tips in mind:
- Always organize your scan files in folders.
- Double-check the format before importing.
- Keep backup copies of your projects.
- Learn shortcut keys in Easy Stand Alone for faster work.
- Regularly update the software to avoid glitches.
Advanced Uses of Easy Stand Alone
Once you know how to add new scan file to Easy Stand Alone, you can go beyond basic usage. For example:
- 3D Editing: Modify the scan after uploading.
- Measurement Tools: Take accurate dimensions from the scan.
- Export Options: Save the file in multiple formats for different purposes.
- Integration: Combine scan files with other design or CAD software.
Helpful Tools and References for Scan File Management
If you are trying to improve your workflow after learning how to add new scan file to Easy Stand Alone, here are some useful links that can guide you further:
- Autodesk Knowledge Network – File Formats and Compatibility
- MeshLab – Open Source Tool for 3D File Editing
- 3D Systems – Guide to STL Files
- ResearchGate – Best Practices in 3D Scan File Management
These resources give you deeper insights into file formats, editing, and professional methods for handling scan files effectively.
Conclusion
Learning how to add new scan file to Easy Stand Alone is not complicated if you follow the right steps. With practice, you will find the process simple, fast, and reliable. Whether you are a student, designer, or professional, mastering this skill can save you valuable time.
The next time you need to upload a new scan, remember the steps discussed above. Prepare your file, import it correctly, check placement, and save the project. With these habits, Easy Stand Alone will become your trusted tool for scan file management.